March 24, 2011

National Poison Prevention Week

This week, March 20-26, is National Poison Prevention Week.  The Government of Canada is working to raise awareness about the dangers of household poisons, as well as to educate about poison prevention.  The theme of this year's campaign: children under five.

Visit http://www.hc-sc.gc.ca/ahc-asc/minist/messages/_2011/2011_03_21b-eng.php for more information from the Ministry of Health.  There are many informative links on this page, including a direct link to Canada's Poison Control Centre.

Health Canada's educational program, Stay Safe, offers an interactive way to educate children about Hazard Symbols.  Stay Safe promotes simple and effective messages for children using guides, as well as on-line activities.  Parents and caregivers will find this very handy.  You can find more information at http://www.hc-sc.gc.ca/cps-spc/house-domes/chem-chim/hazard-danger-eng.php.
 
Healthy Canadians has also jumped on board with tips for chemical safety in the home.  Visit their website at http://healthycanadians.gc.ca/kids/poison-prevention/.

Prevention is one of the easiest ways to keep your children safe.  Simply storing cleaning products and other hazardous items out of their reach can help to prevent an unnecessary visit to the hospital.  Visit the sites that I've listed, and educate yourself and your children about poison prevention.

March 17, 2011

Dessert - Homemade Ice Cream Sandwiches

I LOVE baking.  Every once in a while I like to fancy things up and try a new, elaborate recipe ready to impress.  Do my boys care?  Not really.  They're more than happy to gobble up banana bread and Nana's homemade biscuits.  The simpler the better.  My search for the BEST chocolate chip cookie...not so simple.

Since a young age, I've probably tried hundreds of different chocolate chip cookie recipes.  While reading my favourite blog Listen To Lena! two years ago, I came across a recipe for Anna Olson Chocolate Chip Cookies.  I just had to try them!  One word...DELISH!!!  I haven't used another recipe since.  My family loves them as do my co-workers.  These cookies have a special secret ingredient - cornstarch.  The cornstarch makes the cookies chewy and soft, perfect for dipping in milk.  And perfect for making Homemade Ice Cream Sandwiches!

The chocolaty goodness - hot out of the oven!


With a fresh batch of chocolate chip cookies sitting on my counter, I decided to make a special treat after a Saturday night dinner.  I let some vanilla ice cream soften just a little, and pressed a spoonful between two cookies.  It was a big hit!  Look for a good quality ice cream, one made with real cream.  I used M&M Meat Shops Vanilla Satin Cream Ice Cream which is rich and creamy and full of flavour.

Homemade ice cream sandwiches - can't get any better!

Here is the recipe for what will soon be your favourite chocolate chip cookies!

Chocolate Chip Cookies... à la Lena... à la Anna Olson 

Ingredients:
3/4 cup unsalted butter, softened
1 cup brown sugar
1/4 cup granulated sugar
1 large egg
2 tsp vanilla extract
2 cups all purpose flour
2 tsp cornstarch
1 tsp baking soda
1/2 tsp salt
8 oz bittersweet chocolate, cut into chunks
DIRECTIONS
  1. Preheat oven to 350 degrees F. 
  2. Cream together butter and sugars until smooth. Add egg and vanilla and blend in. Stir in flour, cornstarch, baking soda and salt. Stir in chocolate chunks.  
  3. Drop by tablespoons onto a greased baking sheet and bake for 8-10 minutes, until golden brown around the edges. Let cool slightly and enjoy.

Big-A's version of "Man vs Food"!

*TIPS*
1. Although bittersweet or dark chocolate chips/chunks work best with this recipe, substitute for semi-sweet or milk chocolate if needed.
2. I have margarine in my fridge more often than I have butter.  I have used margarine in this recipe many times and there is almost no difference.
3. If you're making the ice cream sandwiches for a special occasion, prepare them ahead, place on a baking sheet in your freezer and remove from freezer 5 minutes before serving.
4. This dessert is a great alternative to cake or cupcakes at a child's birthday party.  Bake small, bite-size cookies.  Roll the ice cream sides in mini chocolate chips, toasted coconut or colourful sprinkles.


This may not be the healthiest dessert but I believe that you have to enjoy the good things in life, in moderation of course.  This is not a regular dessert offered to my boys, but it is a nice change once in a while, from the usual yogurt and fruit.

March 13, 2011

Lunch - Flat Bread Roll-Ups

A sandwich again?  Awwww Mom!!!

Have you heard this before?  Have you said it to yourself while opening your own lunch bag at work?  Everyone gets tired of the same old sandwich.  With peanut butter and Nutella out of the picture at school, there aren't many fun options for lunch sandwiches.  Why not change up your typical sandwich with a Flat Bread Roll-Up!  Get creative with the ingredients and let your kids join in the fun of making them.

Flat Bread:
  • You can find many different selections of flat bread in your grocery store bakery.
  • Varieties include: Whole Grains; Ancient Grains; White; Whole Wheat; Flax; Sundried Tomato; Cheese; Spinach.
Greens:
  • Bib or Boston lettuce - tender leaves that roll up easily.
  • Baby spinach.
  • Baby bok choy leaves.
Vegetables:
  • Cucumbers or zucchini sliced into ribbons using a harp-style vegetable peeler.
  • Slices of ripe avocado pair well with chicken.
  • Sliced tomatoes (seeds removed).
Meat:
  • Find a low-sodium version of your child's favourite deli meat (try to avoid highly processed meats such as bologna).
  • Cook a chicken or turkey breast the night before.  Chill in the refrigerator and slice thinly once cooled.
  • A couple of slices of pork or turkey bacon, if this is not a choking hazard for your child.
Cheese:
  • Any sliced cheese will do.  Milder cheeses such as mozzarella or light havarti won't overwhelm the flavours in the wrap.
Condiments:
  • Ask your child what condiment they want.  Butter, mayonnaise and mustard are common choices.

Once you choose your ingredients, layer them on the flat bread, roll it up and slice in half or into 1-inch thick discs.  Keep cool in a lunch bag with an ice pack.  Don't forget to include your children when choosing the ingredients and building the wrap.  They'll be excited to eat what they made!

*TIPS*
1. Always wash the lettuce and allow to dry completely to avoid a soggy wrap.
2. Layer wet ingredients like mayo, mustard and tomatoes between the lettuce, meat or cheese, avoiding contact with the flat bread.  This will also help to keep the flat bread dry.
3. If adding sliced veggies to the wrap is not an option, send a small container of raw veggies as a side dish.  A container of fruit or berries would also make a healthy side.
4. Add spices to plain mayonnaise to add flavour to your roll-up.

Lunch shouldn't be boring...for anyone!  Make lunch fun and interesting for your children, and for yourself.  Try different ingredients and flavours and get your kids involved!  Enjoy!

    March 9, 2011

    Lunch & Dinner - Broccoli Parmy Pasta

    Total Prep Time: Approximately 30 minutes

    1 Grain Products (1/2 cup cooked pasta) 
    1 Vegetables and Fruit (1/2 cup broccoli) 

    My family loves to eat pasta.  Whether it's a slow cooked tomato sauce or a quick eggy sauce, my boys are always happy to see a plate of pasta on their place mats at dinner time.  We do serve pasta to our boys once a week, but always make sure to offer a balanced dinner filled with vegetables and protein.

    One pasta dish we cannot stop eating is Broccoli Parmy Pasta.  As a working mom, I'm always looking for fast and easy dinners that won't bore the entire family.  This recipe is so quick to put together and fits into any busy weeknight.  The pasta and broccoli cook in about the same amount of time, and all ingredients are combined into one bowl.  Add as much or as little broccoli to the pasta as you'd like - we load up on it because the boys are broccoli monsters. 


    Broccoli Parmy Pasta 

    Ingredients:
    900 gram bag of your favourite pasta (we use fusilli for this recipe)
    1/4 cup grated parmesan
    2 bunches of fresh broccoli, washed and trimmed
    3 tbsp melted butter or margarine
    1 tbsp dried parsley flakes
    1 tsp ground black pepper

    Directions:
    1. Fill a large pot with cold water, bring to a boil.
    2. While waiting for the water to boil, wash and trim the broccoli.  Cut off the small florets.  Peel the stems and cut into quarters.  Steam on the stove for 8 minutes, or place in a covered glass dish with 1/4 cup of water and microwave for 10 minutes.
    3. When the water comes to a boil, add the pasta.  Cook for 8 to 10 minutes, or until al dente.  Drain and return to the pot.
    4. Drain the cooked broccoli and add to the pasta.  Pour the melted butter/margarine over the pasta and broccoli, stirring to combine.  Add parmesan cheese, black pepper and parsley flakes.  Stir until cheese is melted.  Serve immediately.
    5. Serves 8.
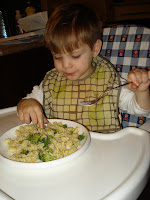
    Lil-J digging in
    When we make this recipe, we use the entire bag (900g) of pasta.  It may seem like a lot of pasta, but this meal tastes even better the next day.  With an entire bag, we have dinner for four, lunch for work the next day, and a quick dinner for the boys the following night.  Total cost for 8 meals?  Under $10!  It goes far and it tastes so good that we don't mind eating it two days in a row.

    Because there is little protein in this meal, serve yogurt for dessert. 


    *TIPS*
    1. Substitute the broccoli for any other vegetable.  Steamed asparagus or baby bok choy would be delicious!
    2. Substitute the melted butter/margarine for extra virgin olive oil.
    3. Add roasted chicken to the pasta for a more complete meal.

    March 1, 2011

    Snack For School Or Home - Yogurt & Berry Dippers

    Total prep time: less than 5 minutes

    1 Milk and Alternatives (3/4 cup yogurt)
    1/2 Vegetables and Fruit (1/4 cup of berries)

    Sometimes bribery is required to get your kids to eat healthy food.  I have spent many nights telling my boys, “If you eat all of your broccoli, you can have ice cream for dessert”.  Thankfully they both love broccoli now and Big-A is more than happy to try new, healthy foods.  But there is the odd time when Big-A puts up a fight, wanting something ‘chocolatey’ after dinner instead of a bowl of fresh fruit.  Instead of traditional bribery, why not make healthy food FUN?  My boys love berries, and they love yogurt.  Separate, they can be boooring!  Why not try Yogurt & Berry Dippers?  It’s so easy, you’ll be serving up this healthy snack daily!


    Simply fill a small child-friendly bowl with their favourite yogurt.  Wash and dry fresh strawberries, and cut into pieces suitable for your child’s age (Big-A likes them halved or whole, Lil-J's are cut into thin slices).  Place the berry slices in the yogurt, making a circle around the bowl.  Serve!

    
    Lil-J enjoying his yogurt & berries and toast for breakfast.
    
    Big-A gobbling up every last bit of berries & yogurt!
    
    *TIPS*
    1. Don’t stop with strawberries.  Drop washed blueberries into the yogurt, give your child a spoon and let them ‘fish’ for the berries in the yogurt.  Melon, bananas and peaches also pair well with yogurt.  Change it up to keep them interested.
    2. Use any yogurt, plain or flavoured.  I prefer to use plain, Balkan yogurt.  I simply stir a tablespoon of honey into the yogurt to add sweetness.  Just remember not to serve honey to a child under 1 year of age.
    3. Let your children help to prepare this snack.  The younger ones can help to wash and dry the berries, scoop yogurt out of the container and even stir in the honey.  Your bigger kids can help the little ones, and they may also want to try cutting up the strawberries or other fruit.
    4. When I make this for an afternoon snack on the weekend, I add whole almonds to my bowl.  Granola would be a delicious addition as well.  This may encourage your little ones to add more nutrition to their bowls!