October 28, 2010

Lunch or Snack - Super Simple Cheese & Crackers


Total Prep Time: Less than 5 minutes
1 Milk & Alternatives (50 grams of cheese)
1 Grain Products (35 grams of whole grain crackers)


I have always loved snacking on cheese and crackers.  I often serve them with a side of grapes as an afternoon snack for my boys.  I also send Aidan to school with cheese and crackers for his snack.  There are so many different variations to try.

When purchasing crackers to send to school, make sure that you choose nut free crackers.  Not all brands will have the nut-free symbol, but many are approved by schools.  Ask your child's school for a list of approved nut-free brands - most should have a list available.  Also, read the label.  Look for crackers that are low in sodium and high in fibre.

PC Mini Chefs Funshines Biscuits
PC Blue Menu Snack Crackers
Honey Maid Grahams
Dare Breton Minis or Vinta Crackers
Triscuit

**You can also substitute traditional flat crackers for animal cookies.

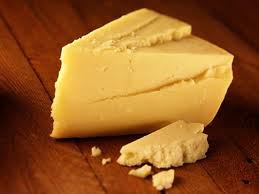
Now, onto the cheese.  Cows don't produce orange milk.  Why are we buying orange cheese?  Most orange cheese contains 'natural' food colour that is not natural to a milk product.  There are so many delicious white cheeses that your children will love.

White cheddar - semi-hard cheese; sharp flavour
Havarti -semi-soft cheese; creamy texture; mild flavour (don't stop with plain havarti, try jalapeno or garlic & herb)
Gouda - semi-hard cheese; sweet, fruity flavour
Babybel - semi-soft cheese; covered with it's signature red wax coating
Swiss - hard cheese; mild, sweet, nut-like flavour; full of holes (fun for kids!)
Dolce Provolone - semi-soft; smooth texture; mild flavour

Cheese and crackers are a perfect school snack or lunch for your little one.  If you are serving for lunch, add an apple or some fresh raw veggies for a balanced meal.

*TIPS*
1. If you are concerned with serving your children high fat snacks, you can find low-fat versions of most of these cheeses at your local grocery store.
2. Add some sliced, low-sodium ham or turkey for a protein kick.  No need to buy expensive, salt-ridden Lunchables when you can make them yourself!

Happy eating!

October 24, 2010

Snack - Carrot Cake Muffins

We all know that carrots are a delicious, über healthy vegetable that we should all be consuming daily.  The convenience alone is good reason for daily snacking, along with high sources of fibre and vitamins.

We all know, as well, that children are easily bored by eating the same foods week after week.  They may be tired of eating carrots raw with dip, or steamed and served with dinner.  Get your little ones ready with their aprons and wooden spoons, and bake up a batch of Carrot Cake Muffins!  I am ready and willling to share the absolute best carrot cake recipe EVER, given to me by my mother long, long ago!  She still has the original Toronto Star newspaper clipping and this receipe has been passed along to family and friends with great results!
 
The recipe below is for a traditional carrot cake, cream cheese icing included - yum!  I have provided instructions on making muffins.  I ice the muffins for dessert or to treat my co-workers.  For Aidan's school snack I leave them plain, slicing into three portions.  The muffins are very moist, full of flavour and they do not fall apart.  He never misses the icing, but I sometimes spread a little in between the slices for an extra special treat.


Carrot Cake

Ingredients:
3 1/2 cups grated carrots
2 cups flour
2 cups sugar
2 tsp baking soda
2 tsp cinnamon (I sometimes use Pumpkin Pie Spice instead)
3/4 cups vegetable or canola oil
4 large eggs
1 tsp vanilla

Directions:
  1. Preheat oven to 325 degrees F.
  2. Combine flour, baking soda and cinnamon in a small bowl.
  3. Combine sugar, oil, eggs and vanilla in a large bowl, mix well.
  4. Add dry ingredients to wet ingredients, mix until just combined (do not over mix).
  5. Add grated carrots and mix until just combined.
  6. Pour batter into two round cake pans.  I like to line them with aluminum foil (the pans stay clean and the cakes don’t stick at all).
  7. Bake for 45-55 minutes.  Check at 45 minutes with a toothpick.  Cakes are ready when toothpick comes out of cake clean.
  8. Allow cakes to cool completely before icing.  The cake can be halved easily once cooled - it will not fall apart.  Perfect for making a gorgeous 4-tiered cake.
** This recipe makes 21 muffins.  Bake at the same temperature for no more than 45 minutes.  Allow to cool before icing.  Muffins will freeze well in a freezer bag for a convenient snack option.

Cream Cheese Icing (optional...if you can resist!)

Ingredients:
1 package of cream cheese (use full fat, not low fat), room temperature
1/2 cup unsalted butter, room temperature
3 1/2 cups icing sugar
1 tsp vanilla
1 tbsp juice (any citrus juice or juice blend will do)

Directions:
  1. Using a mixer, combine cream cheese, butter, vanilla and juice until creamy.
  2. Add the icing sugar in four parts, mixing well before adding each one.
  3. Ice cake immediately or cover in a bowl and refrigerate until you’re ready to use.  The icing also freezes well in a zip-seal plastic bag or container.
** This icing is also delicious on chocolate brownies or chocolate cupcakes.


*TIPS*

1. Before sending your little one with homemade baked goods for a school snack or with their lunch, check with their teacher to make sure that this is allowed.  Many schools have banned homemade baked goods, due to high numbers of children with nut allergies.

2. Freeze extra muffins in a freezer bag for quick and easy breakfast options.


Click here for a printable version of this recipe!

October 20, 2010

Hand Washing Quickie

Most children are introduced to alcohol-based hand sanitizers at a very young age.  Public washrooms, medical clinics and even family farms are equipped with stations where they can easily pump out gel or foam to clean their hands.

Concerns have been raised by the media about children using hand sanitizers containing alcohol.  The worry is that the high concentration of alcohol (most contain more than 60% alcohol) could make it flammable and intoxicating.  If you are looking to avoid alcohol-based hand sanitizers, there are options. 

Soapopular and X3 make non-alcohol hand sanitizers.  They contain benzalkonium chloride, an antiseptic agent.  Clean Well makes a non-toxic sanitizer that contains antiseptic plant oils.

If you choose to allow the use of alcohol-based hand sanitizers for your children, look for brands made with ethyl alcohol (the same type found in alcoholic drinks).  Avoid isopropyl alcohol, as even in small doses it can be fatal.

With flu season around the corner, every brand of sanitizer will be flying off store shelves.  Hand sanitizers are very useful in preventing illness, but don't forget about the original hand sanitizer - soap and water.  Review proper hand washing practices with your children.  Only soap and water will remove blood, dirt and grime from their hands.  Have them sing their ABC's while scrubbing the tops and bottoms of their hands, in between their fingers and around their nail beds.

For more information on proper hand washing, refer to the following link: http://www.health.gov.on.ca/english/public/program/pubhealth/handwashing/handwashing_mn.html.


*TIPS*
1. Fill a zip sandwich bag with a small stack of unscented baby wipes and place in your child's backpack.  Encourage them to use the wipes whenever their hands are dirty.
2. If you are looking to avoid soaps and chemicals from coming in contact with your child's hands, simply wet a clean facecloth, wring it out and place in a zip sandwich bag in place of baby wipes.


Stay healthy this season, practice proper hand washing and encourage your family to do the same!

October 18, 2010

Snack - No Choke Carrot Sticks

Total Prep Time: Approximately 20 minutes
1 Vegetables & Fruit (1/2 cup carrots, approximately 1 medium carrot)


Orange; Crunchy; Sweet; Superfood ... CARROTS!

Health Facts:
  • One raw 7 inch carrot contains only 31 calories, 7 grams of carbohydrates and a huge 2.2 grams of fibre!
  • Excellent source of beta carotene, which converts to Vitamin A in the body
  • Source of folacin (folic acid or Vitamin B9)
  • A portable snack, perfect for day trips or break time at work
Fun Facts:
  • Popular Ontario varieties include Six-Pak, Avenger, Apache and Caro-chief
  • A very early food in history, native to the part of Asia now known as Afghanistan
  • Known as "Queen Anne's Lace" in it's wild state
Carrots are the perfect snack for your growing child.  They do have one downfall, though.  In their raw form, carrots are very high on the list of 'choking' foods.  Aidan came home from SK the other day and told me that a little girl in his class brought carrot sticks for snack and choked.  He was pretty freaked out by it.  I'm sure the teacher was as well!

Fear not!  I have a handy solution to this common carrot problem, which will have you sending your kids to school with them, and feeding them to your pre-schoolers without that choking fear holding you back.


Clean and peel 4 large carrots.  Cut off both ends.  Cut each carrot into 2-3 inch pieces, then quarter each piece.
Place carrot sticks in a large pot, cover with water and add a pinch of salt.  Bring to a boil, then lower temperature to a low simmer.  Leave for 5-7 minutes.  Check occasionally, making sure that they do not completely cook through.
When you are able to pierce them with a fork (they shouldn't break apart), drain the water and place the carrot sticks on a kitchen towel or paper towels (see picture on the left).  Allow to completely cool, store in the refrigerator in a container for up to 5 days.

These soft carrot sticks are a perfect snack option for young children.  They should be hard enough to dip, but they are no longer a choking hazard.  They're also very handy as an on-the-go snack for toddlers.

*TIP*
Double or triple the number of carrots above and prepare.  When dinner time comes, place enough carrots to serve your family in a pan and sautee with butter, salt, pepper and fresh parsley.  You don't have to wait for your carrots to cook, you're simply reheating them.  They should be ready in a couple of minutes.

October 14, 2010

Lunch & Dinner - Potato Leek Soup


Total Prep Time: Approximately 2 hours
2 Vegetables & Fruit (1 cup soup)

Are you looking for the perfect soup to pack in your child's lunch?  How about warm, hearty potato leek soup!  It will warm your child's tummy, and give them energy to last them through the day.  It's the perfect 'leftover' lunch for school.  Fill a food container with the soup, pack a small piece of whole grain bread for dipping, and you will have a very happy camper at lunch time!

Although any stainless steel, BPA-free container will suffice for this hot lunch, I would suggest investing in a Thermos Brand food jar for hot lunches like soup, stew and chili.  They are BPA-free, come in many different styles and have an easy twist top for little hands to manipulate.  Their "Funtainer" line has coordinating lunchbags/hydration bottles/food jars which kids just love!

Now, back to the soup!  I had my first potato leek soup experience at the River Cafe in Puerto Vallarta - TO DIE FOR!  I have been hooked ever since!  I always wanted to make it at home, but was not impressed with the recipes that I found online or in my cook books.  Then one day, I came across a recipe on Martha Stewart's website and it's the only one that I make.  You can find the original recipe on the following link: http://www.marthastewart.com/recipe/favorite-potato-leek-soup.  I'll give you my revised recipe, in which I've cut down the fat, added more vegetables and changed the flavour a bit.

Dinner guests have raved about it and my kids love it.  I wasn't sure if they would because the soup does contain a large amount of onions and leeks, but it was a big hit.  The creamy texture and layers of flavours make a perfect autumn meal.

Potato Leek Soup

Ingredients:
2 dried bay leaves
2 tsp dried savoury
1 tsp dried parsley
1 tsp whole black peppercorns
2 tbsp olive oil
4 tbsp Becel margarine
4 stalks celery, cut into 1/4-inch dice
6 leeks, white and light yellow parts only, washed well, thinly sliced
4 shallots, diced
6 cloves garlic, minced
2 1/2 pounds Yukon gold potatoes, peeled and cut into 1-inch pieces
2 large carrots or parsnips, peeled and cut into 1-inch pieces
8 cups low-sodium chicken broth, homemade or canned (use vegetable stock to make a vegetarian meal)
1 1/4 cups 1% milk
1/4 cup half & half cream
Kosher salt and fresh ground black pepper

Directions:
  1. Make a bouquet garni: First wrap bay leaves and pepper corns in a piece of cheesecloth.  Then tie with a piece of kitchen twine, set aside.  I use dried herbs (parsley and savoury) and add them straight to the soup.  I like seeing the herbs in the finished product. 
  2. Heat olive oil and margarine in a medium stockpot.  Add celery, leeks, shallots and garlic; cook on medium-low heat until very soft, about 45 minutes, stirring occasionally.  Do not brown.
  3. Add stock, potatoes, carrots/parsnips, bouquet garni and other dried herbs.  Bring mixture to a boil, then reduce to a gentle simmer.  Cook until potatoes and carrots/parsnips are very tender, approx. 40 minutes.  Remove bouquet garni, and discard. 
  4. Add milk and cream, and blend soup in the cooking pot using a hand blender.  Make it completely smooth, or leave some chunks of vegetables.  Add salt and pepper to taste.  If you are using a counter-top blender, make sure that the soup has cooled to avoid burning yourself.  Emulsifying the soup with a blender is the key to a thick, creamy consistency.

Serves 6-8

Serve immediately with crusty bread and a salad.  Store in the refrigerator for up to three days.  The soup reheats very well on a stovetop or in the microwave.

Don't let homemade soup intimidate you.  It's a bit of work but totally worth it.  Add other root vegetables to increase the nutrients.  Change the flavours by adding your favourite herb, a sprinkle of bacon or pancetta, or some grated parmesan cheese.  Use the original recipe as a base, but use your creativity to make a soup to match your family's tastes.

Enjoy!


Click here for a printable version of this recipe!

October 13, 2010

Mommy Break Time...25 Reasons I Love My Mother

We all need a break at some point in our busy day.  For a good laugh, read the 'Momism's' below...they're somewhat familiar to me!

25 REASONS I LOVE MY MOTHER

1. My mother taught me TO APPRECIATE A JOB WELL DONE.
"If you're going to kill each other, do it outside. I just finished cleaning."

2. My mother taught me RELIGION.
"You better pray that will come out of the carpet."

3. My mother taught me about TIME TRAVEL .
"If you don't straighten up, I'm going to knock you into the middle of next week!"

4. My mother taught me LOGIC.
" Because I said so, that's why."

5. My mother taught me MORE LOGIC.
"If you fall out of that swing and break your neck, you're not going to the store with me."


6. My mother taught me FORESIGHT.
"Make sure you wear clean underwear, in case you're in an accident."

7. My mother taught me IRONY
"Keep crying, and I'll give you something to cry about."

8. My mother taught me about the science of OSMOSIS.
"Shut your mouth and eat your supper."

9. My mother taught me about CONTORTIONISM.
"Will you look at that dirt on the back of your neck!"

10. My mother taught me about STAMINA.
"You'll sit there until all that spinach is gone."

11. My mother taught me about WEATHER.
"This room of yours looks as if a tornado went through it."

12. My mother taught me about HYPOCRISY.
"If I told you once, I've told you a million times. Don't exaggerate!"

13. My mother taught me the CIRCLE OF LIFE.
"I brought you into this world, and I can take you out."

14. My mother taught me about BEHAVIOR MODIFICATION.
"Stop acting like your father!"

15. My mother taught me about ENVY .
"There are millions of less fortunate children in this world who don't have wonderful parents like you do."

16. My mother taught me about ANTICIPATION.
"Just wait until we get home."

17. My mother taught me about RECEIVING .
"You are going to get it when you get home!"

18. My mother taught me MEDICAL SCIENCE.
"If you don't stop crossing your eyes, they are going to freeze that way." 


19. My mother taught me ESP.
"Put your sweater on; don't you think I know when you are cold?"

20. My mother taught me HUMOR.
"When that lawn mower cuts off your toes, don't come running to me."

21. My mother taught me HOW TO BECOME AN ADULT .
"If you don't eat your vegetables, you'll never
 grow up."


22. My mother taught me GENETICS.
"You're just like your father."

23. My mother taught me about my ROOTS.
"Shut that door behind you. Do you think you were born in a barn?"

24. My mother taught me WISDOM.
"When you get to be my age, you'll understand."

25. My mother taught me about JUSTICE
.

"One day you'll have kids, and I hope they turn out just like you."


Very funny!  On a serious note, my own list is never-ending.  I am blessed to have an incredible mother and I strive to be like her every single day!

October 11, 2010

Charlie Brown Was Right...Pumpkins ARE Great!


Total Prep Time: Approximately 30 minutes

1 Vegetables & Fruit (1/2 cup pumpkin)
1 Meat & Alternatives (1/4 cup pumpkin seeds)


Canadian Thanksgiving is over.  Our tummies are full of roasts, turkey, ham and all the fixings.  You may have had apple pie for dessert one night, pumpkin pie the next.  Apples will continue to be a part of your diet throughout the next year.  Why should pumpkins be pushed to the back of the line until next year?  It's worth making them a staple in your family's diet.

Pumpkins come in many different varieties, from white 'Ghost' pumpkins, to red 'Tomato' pumpkins, even a green 'Cinderella' pumpkin that is identical to the carriage from the fairytale story!  But there's much more to this vegetable than funny names and funny appearances.

  • Excellent source beta carotene (antioxidant)
  • Great source of Vitamins A, E, C and B6
  • Also contain potassium, calcium and iron
  • Very low in sugar, fat and cholesterol and high in fibre
  • Pumpkins are a great food for diabetes patients as they are known to have the ability to stabilize blood sugar levels.

It's not just the pumpkin flesh that is good for you.  The seeds contain protein, copper, iron, magnesium and zinc.  They also contain high levels of tryptophan, the feel-good, makes-you-sleepy amino acid that we all consume too much of during the holidays!

Pumpkin can be used as a sweet or savoury side to many meals.  Roasting and pureeing pumpkin are common cooking methods, and it can replace squash in any dish, including soup.  Add uncooked pureed pumpkin to a muffin recipe or to pancakes for a healthy breakfast option.

Both Big-A and Lil-J devoured my homemade pumpkin pie tarts during this holiday.  Big-A's favourite part was the 'orange middle'.  I was pleased as pie knowing that he loved the actual pumpkin most, especially considering that they were topped with a spiced whipped cream!  I will continue to bake with pumpkins during these chilly autumn and winter months, while my family is craving the comforting scents of cinnamon, cloves and nutmeg...mmmm!  And I'll make sure to not forget about them once the warm weather is back.

While you're carving your jack 'o lanterns for Halloween, make sure to save the seeds for a nutritious snack.  They're very easy to prepare:

Roasted Pumpkin Seed Recipe

~Scoop the seeds out of a pumpkin, place in a large bowl.
~Remove any large pieces of pumpkin flesh, rinse seeds well to remove any clingy fibres.
~Allow seeds to dry on paper towels.
~Once dry, place seeds back in a large bowl.
~Drizzle with canola oil, sprinkle with kosher salt and your favourite spice.  I like to use paprika.
~Roast at 375 degrees F in the oven for approximately 30 minutes, stirring occasionally, until the seeds are golden brown in colour.
~To store, allow the seeds to cool completely and place in an airtight jar or zip bag.  They will store for one week at room temperature, or for up to four weeks in the refrigerator.

Let your child join in the fun.  They can help dig out the raw seeds (if they're brave enough to stick their hands into the slimy pumpkin!), they can help to wash the seeds and they can also mix the seeds, oil and spices in the bowl.  Add roasted pumpkin seeds to your salad, granola or muffins.  Sprinkle on top of a casserole.  Or just munch on them as a snack.  You won't be able to stop!  Just remember that they are very high in fibre and too many can give children a tummy ache.

If your child likes roasted pumpkin seeds and can safely eat them without choking, send him to school with a small container for his snack.  He can tell his friends and teacher how he helped to roast them.  Add a piece of fruit or a container of yogurt for a balanced snack.

I look forward to sharing more pumpkin recipes with you.  Don't let this amazing vegetable escape for another year!

Now, time for a cup of tea and a delicious pumpkin pie tart...I'm glad that I made extra!


Click here for a printable version of this recipe!

October 9, 2010

Canada's Food Guide


Have you taken a good look at Canada's Food Guide lately?  Check it out at
http://www.hc-sc.gc.ca/fn-an/food-guide-aliment/index-eng.php.


If you feel a bit overwhelmed trying to follow it, you're not alone.  I will admit that I don't go straight to the guide when meal-planning.  The thought of having to match my children's food intake with the numbers on the guide seem impossible on a good day!  But I do look at it occasionally for a refresher course on what my children need in their diet.

You can download a PDF version or order a free paper copy.  Health Canada has made obtaining this handy guide easy for anyone who wants it.  Also take a look at the numerous links on the site providing information from choosing the best food for your child to tips on how to have a healthy and active lifestyle.

Make sure to read both pages of the Food Guide.  The first page provides you with the 'Recommended Number of Food Guide Servings Per Day', examples of single servings for the four food groups, as well as tips on how to make healthier choices within the food groups.  The second page provides you with information on how to have a healthy lifestyle and instructions on how to read food labels.

I would suggest ordering a free paper copy on the website and hanging it inside your main food cupboard in your kitchen.  Having it easily available will make it easier to follow on a daily basis.  You can also share it with your children, show them how to read it, and discuss the importance of it.  Encourage your 5-year old to meet his 5 servings of fruit & veggies in a day, make it a fun competition!  It's our responsibility as parents to provide our children with the tools needed to live a healthy life.

For each of my snack and lunch ideas, I will post a link to Canada's Food Guide as a friendly reminder for your refresher course, along with the number of servings for the foods suggested.

Happy and healthy eating!

October 7, 2010

Snack - Criss Cross Applesauce!

Total Prep Time: Approximately 30 minutes

1 Vegetables & Fruit (1/2 cup applesauce)

Autumn is here and Ontario's vast number of orchards are filled with juicy apples just waiting to be picked!  Take advantage of the beautiful fall weather we're expecting this weekend, pack up the family and head out for some apple picking fun.  You may even find a farm with a pick-your-own pumpkin patch!

For a listing of Ontario apple orchards, follow this link: http://www.allaboutapples.com/orchard/on.htm.

The simplest apple recipe that I use is for homemade applesauce.  It's perfect for a school snack, or to go with a school lunch in place of a piece of fruit.  Add some cinnamon for some extra flavour.

Homemade Applesauce

Ingredients:
4 large apples
1/2 cup of cold water or apple juice
  1. Wash, peel, core and quarter the apples.
  2. Place apples in a small pot and add water or juice.
  3. Turn stove on high heat until apples start to steam.  Lower temperature to med-low.  Stir apples every couple of minutes.
  4. Once the apples have broken down (mushy), the applesauce is complete.
  5. Refrigerate and use within 4 days.
*TIPS*
1.  If you have an infant or preschooler, fresh applesauce is a perfect snack or dessert.
2.  Stir applesauce into warm oatmeal for a delicious, healthy breakfast.
3.  Applesauce is a perfect pairing with pork.  Roast a pork loin and serve applesauce on the side for a meal that your family will drool over!


Click here for a printable version of this recipe!

October 5, 2010

H2O Woes

Is getting your child to drink water a daily battle in your household?  If it is, I’m sure that sending water with school snacks or lunches is like a scene from The Excorsist.  With the other kids bringing juice boxes, Kool-aid Jammers and pop (ack!) to school, it can be very difficult to convince your child that water is the best choice.

Tough love seems to work for my family.  If Aidan doesn’t want to bring water (or milk) to school, he can drink from the water fountain when he's thirsty or have nothing to drink until he gets home.  It's his choice, there are no other options.  I know...mean mom!  I know that this doesn’t work for all families, though.

Cue the colourful world of water bottles!  Children love bright colours, ‘cool’ designs and independence.  Bring your child shopping and allow them to choose their own reusable water bottle.

There are so many choices, from plastic to aluminum.  Whatever you choose, make sure that they are BPA-free, are made of materials that won’t leach into the water, and are leak-proof.

To help you out, I've listed numerous hydration bottles that can easily be found in stores.

Recyclable
Large selection of sizes, colours and designs
Price Range: $20-$50

Camelbak
Four different styles, three different sizes, numerous colours
Price Range: $10-$20

Large selection of sizes, colours and designs
Price Range: $20

Bottles do not transfer the temperature to the outside of the bottle (not too cold for a child to hold onto)
Reasonably priced, simple design, solid colours, three sizes
Price Range: $20-$30

Child-friendly generic colours and designs on their hydration bottles
Simple pink and blue colours on their ‘Foogo’ sippy cup line
Numerous brand-name designs on their lunch bags/containers/bottles (ie: Spiderman and Tinkerbell)
Price Range: $10-$30

Born Free
Trusted BPA-free baby bottle manufacturer
Small selection for bigger kids
Price Range: $10-$15

Most of the water bottles listed can be purchased at health food stores and sporting good stores.  Thermos and Born Free can be purchased at most grocery stores and major department stores.

You may be tempted to fill your child’s water with ‘singles’ powders, or send them to school with fruity water.  Most contain artificial sweeteners.  Nestea/Crystal Light Singles powders and Nestle Purelife Splash fruit-flavoured water all contain sucralose.  Research artificial sweeteners such as sucralose, aspartame, saccharin, maltitol and sorbitol before deciding if they belong in your family's diet.  And remind yourself and your children that water isn't meant to taste sweet.  Its job is to hydrate our bodies.  I don't want my children expecting something sweet tasting every time they have a drink.  'Sweet' rhymes with 'treat' for a reason!

*TIP*
If you have a preschooler at home, buy him his own water bottle as well.  Let him drink water out of it when you are on an outing or playing outdoors.  Getting him used to drinking water from a reusable water bottle at such a young age will make sending him with one to school much easier on everyone.

October 1, 2010

The Three R's...Reusable Containers

I used to drive my husband crazy (well, I'm sure I still do!) by saving the empty plastic baby food cups and lids (Heinz or Gerber) leftover from my son's meal.  I'm glad that I ignored his requests to just toss them.  I use them all of the time, in many different ways.
  • Filled with dried fruit (cranberries and raisins) for Big-A's school snack, as I have to send a re-useable container **
  • Filled with Cheerios for Lil-J when I'm on-the-go
  • I fill the small container with almonds and the tall container with cottage cheese for my 3pm work snack
  • I fill the small container with granola and the tall container with yogurt and berries for an afternoon parfait, no mushy granola!
The lids also fit most applesauce snack cups (Mott's Fruitsations, President's Choice).


** Using them for small school snacks is a great space saver in an already packed lunchbag or backpack.  I fill them with dried fruit and place the container inside a larger one filled with banana bread, etc.  It keeps the food separated but keeps the entire snack together.  There's a better chance of your child eating his entire snack or lunch at school if you keep things simple for them.